Open concept floor plans sell on paper. But in listing photos, they often disappoint — a sprawling room that feels underdefined, furniture floating in space, zones that blur into one confusing mass. Buyers say they want open concept, then scroll past listings that can't pull it off visually.
The fix isn't more furniture. It's smarter staging. Here's how to make every connected zone feel intentional, spacious, and move-in ready.
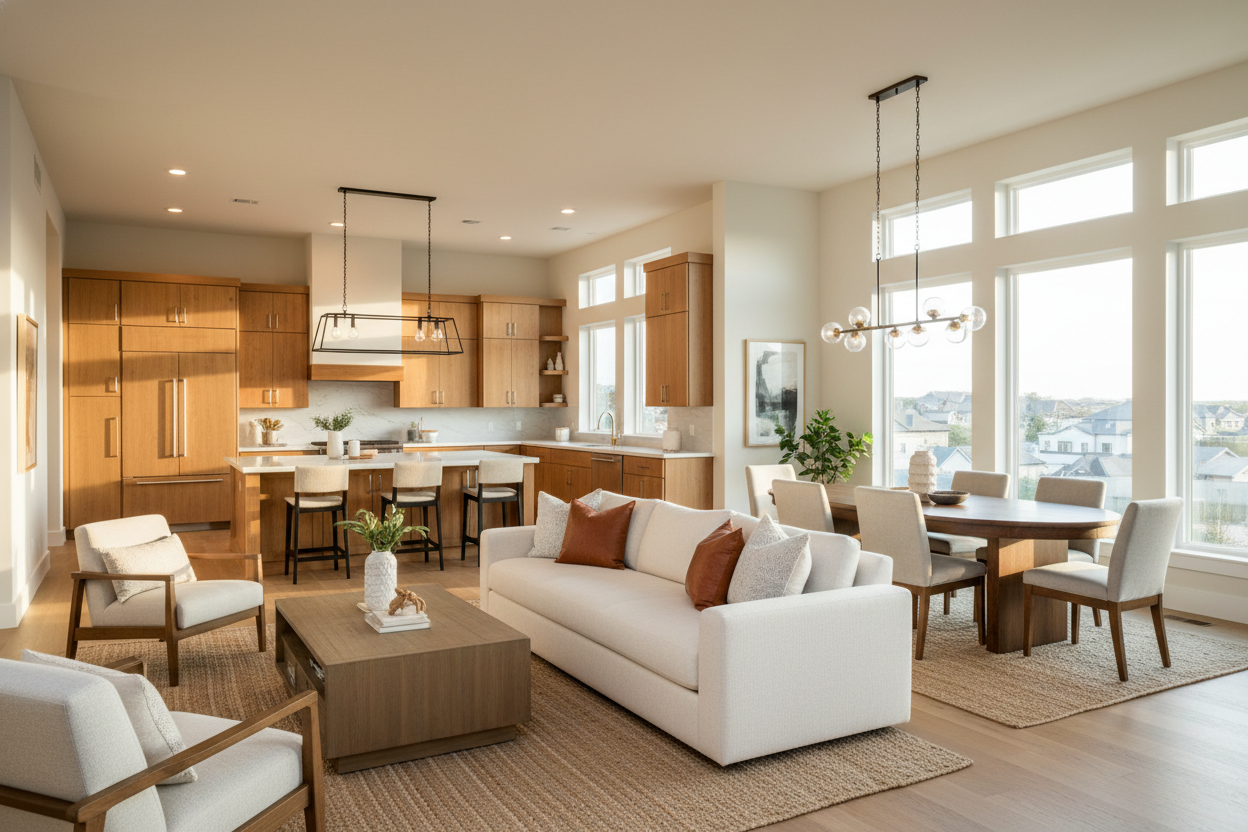
Define Zones Without Walls
The biggest challenge in open concept staging is giving each area — living, dining, kitchen — its own identity without physical dividers. The tools you use instead of walls are area rugs, furniture groupings, and lighting.
- Anchor the living area with a rug large enough to fit all major seating pieces (at minimum, front legs on the rug).
- Float the sofa away from walls rather than pushing it to the perimeter — this creates a room within a room.
- Position the dining table to align with the kitchen island rather than centering it arbitrarily in the open space.
- Use pendant lights above the dining table and a chandelier or statement floor lamp in the living area to signal distinct zones.
In photos, well-defined zones read as larger and more livable than a single open expanse. Buyers can mentally inhabit each area separately — which is what drives emotional connection.
Commit to a Single Cohesive Style
When three spaces flow into each other, inconsistent style becomes unavoidable. A rustic farmhouse sofa next to a sleek modern dining set next to a traditional kitchen screams "different owners, different decades." Buyers register the discord even when they can't name it.
Pick one design language and apply it everywhere in the frame. Modern transitional is the safest default for open concept — it bridges clean-lined furniture with warm wood tones and works in virtually any architectural context. For a bolder choice, Japandi or coastal styles both photograph exceptionally well in wide, open frames.
With virtual staging, consistency is trivial — you select the style once and every piece Stagerify places adheres to it across all three zones simultaneously.
Control the Color Palette Across Zones
Color is the invisible thread that either ties an open concept together or exposes every mismatch. The rule: one dominant neutral, one accent, one warm wood tone — repeated in every zone.
- Dominant neutral: warm white, greige, or soft linen on walls, large upholstery, and cabinetry.
- Accent: one consistent color (muted sage, dusty blue, or terracotta) appearing in throw pillows, a dining chair upholstery, and a small kitchen object.
- Warm wood: the dining table, a coffee table, open shelving, or flooring — pulling the eye through the entire space.
When buyers see the same palette echoed from the kitchen through to the far wall of the living room, the space reads as designed — not assembled. That perception alone justifies a higher offer price.
Scale Furniture to the Full Footprint
Open concept rooms punish undersized furniture mercilessly. A standard 84-inch sofa that looks perfectly proportioned in a separate living room can disappear in a 600-square-foot open plan space, making the room feel sparse rather than grand.
Scale up across the board: a longer sofa (90–100 inches), a larger area rug (9×12 or 10×14), a dining table that seats six even if the current owners only need four. Bigger furniture makes the space feel intentionally large — not accidentally empty.
This is where virtual staging is particularly powerful. You can test multiple furniture configurations and scales in the same space and choose what photographs best, without moving a single physical piece.
Shoot Diagonally to Show the Flow
Most listing photographers default to shooting straight-on from doorways. In open concept spaces, that angle compresses depth and hides what makes the floor plan special. Instead, shoot from a far corner at a diagonal — you'll capture all three zones in a single frame, showing buyers the full spatial relationship between living, dining, and kitchen.
For virtual staging purposes, this means uploading your widest diagonal shots rather than straight-on room views. The AI has more spatial context to work with, and the resulting staged image conveys the openness buyers are actually buying.
Open concept staging done right is one of the most powerful tools in your listing arsenal. The spaces photograph at their best, the floor plan's key selling point becomes visible, and buyers can instantly imagine themselves living there. Virtual staging makes it achievable on any budget — and repeatable across every listing in your portfolio.